Thickness Optimization
After establishing a trial design, PMED allows you to optimize the thickness of any layer above the foundation (semi-infinite thickness). You can only optimize a single layer at a time in 0.5 inch increments.
Optimization is the selection of the lowest thickness within a given range of maximum and minimum thicknesses you define. PMED first selects the minimum thickness value and determines if the minimum thickness satisfies the performance criteria. If the run is successful, the process stops there. Otherwise, the program selects the maximum thickness value for its next run. If both minimum and maximum thicknesses are unsuccessful, the process stops. If the maximum thickness value is successful, the program selects the mid-point thickness value between the maximum and minimum thickness for its third run. Irrespective of the outcome, the program chooses the mid-point between the thickness of the last successful run and the last unsuccessful run for all further runs.
Ways to Access this Interface
In the Explorer tab, expand Project tree and double-click on the Optimization node.
Populating the Inputs in this Interface
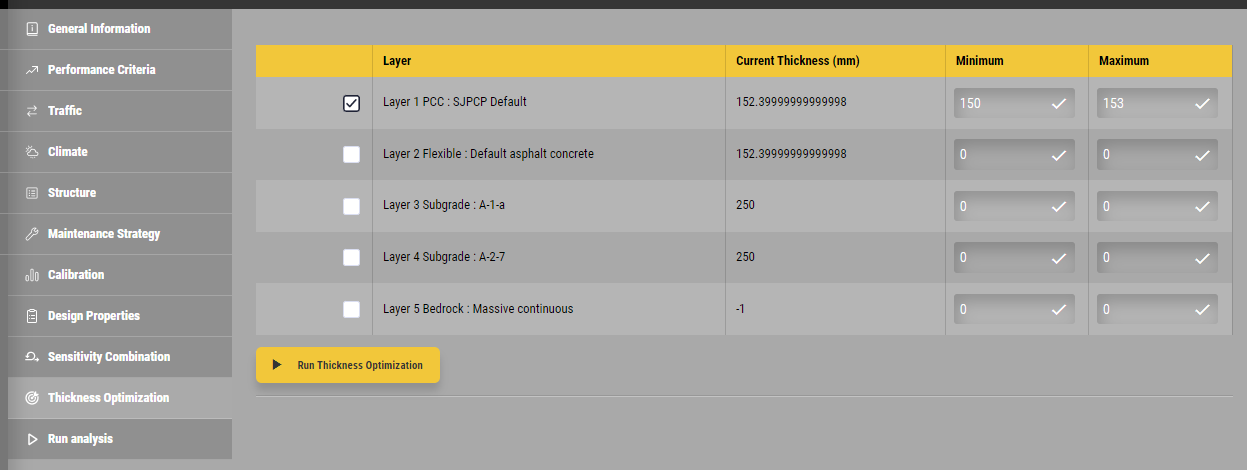
Figure 860: Thickness Optimization
The Design Layers table displays the pavement layers (above the foundation layer) of your trial design. This table has five controls (columns):
Use: This control allows you to select a pavement layer of your choice for which the layer thickness will be optimized. You can select only one layer at a time.
Layer: This control displays the layer type as defined in your trial design.
Default Thickness: This control displays the thickness of the given layer you defined in the materials property page.
Minimum Thickness: This control allows you to define the minimum thickness for which the given layer will be optimized.
Maximum Thickness: This control allows you to define the maximum thickness for which the given layer will be optimized.
Click on the Optimize Thickness button found at the bottom of the screen to run the optimization process. In real-time, PMED displays the history of the optimization process by showing thickness and outcomes of all previous runs. In addition, the program also displays the thickness and status of the current run. At the top left of the screen, the Last Optimized Thickness control updates the results of the optimization process in real time. A green fill displayed in the control box indicates the thickness of the last successful run, while a red fill indicates the last unsuccessful run i.e. none of the previous runs were successful.
- Select a layer in the list. Check its check box.
- Enter values for Minimum Thickness and Maximum Thickness.
- Click on the Optimize button.
- The application will perform all calculations. When it has found the lowest allowable thickness, it will display in the Last Optimized Thickness field at the top-left of the tab.
Optimization Rules Table
- Use: This control, when activated, includes the current row of rule information as part of the optimization parameters.
- Property: This control allows you to select a property of the design to modify in order to customize the optimization process.
- Rules: This control allows you to enter valid text rules (one per line) to apply to the design property identified in the Property field of this table.
- Criteria: This control allows you to enter valid text that establishes the limits (such as upper and lower) of the modification entered into the Rules field.
Note:
The Optimization Rules table is only available for JPCP design.